 Halloween Anime Pumpkin Video Tutorial
 Beach Camera Girl Study
 My top 5 hidden gem songs of 2010
 G.E.E.R. – The Christmas Game That Never Was
 Bacon Ornament Tutorial


:origin()/pre01/5e19/th/pre/f/2016/042/3/0/sae_at_the_beach_by_sererena-d9rcwsx.jpg)
:origin()/pre00/4175/th/pre/i/2015/139/6/b/anime_north_2015_flyer_by_sererena-d8tyn1h.jpg)
Boo Plush Tutorial

Wee! Halloween is around the corner, so I decided to alter my Kirby plush pattern to make a Boo plush tutorial! I made this one as a birthday gift for a friend. Like the the Kirby plush, this can be sewed partly by machine, but I made this one by hand. The final plush is about 6 inches high. It’s good for beginning or intermediate sewers. It takes about 2 hours to make.
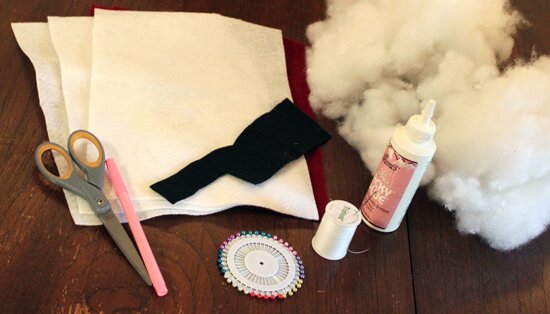
Materials and Tools
- Two or three 12″ pieces of white felt
- Red, White and Black scraps of felt (buy online)
- Batting/Stuffing (buy online)
- Glue (I used Aleene’s Tacky Glue)
- White Thread(buy online)
- Scissors
- Fabric Marker(buy online)
- Pins
- Needle
- Sewing Machine (Optional)
- The Pattern Print-out: [Page 1],[Page 2]
![[Page 1]](/wp-content/uploads/2010/10/Boopattern1.gif)
![[Page 2]](/wp-content/uploads/2010/10/Boopattern2.gif)
Instructions
-
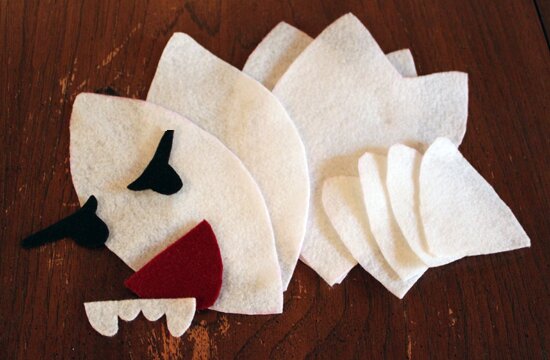
Print out the pattern ([Pattern Page 1],[Pattern Page 2]) on two letter-size pieces of paper and cut out pieces of the pattern. Use your marker to trace and cut out the shapes of the pattern. -
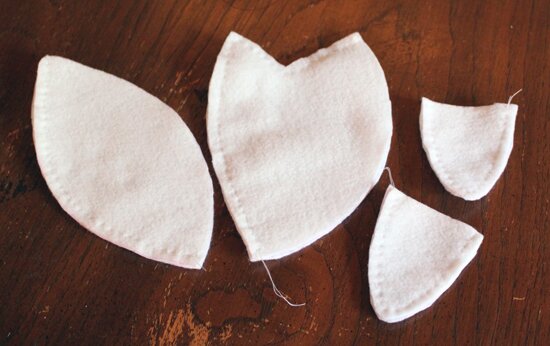
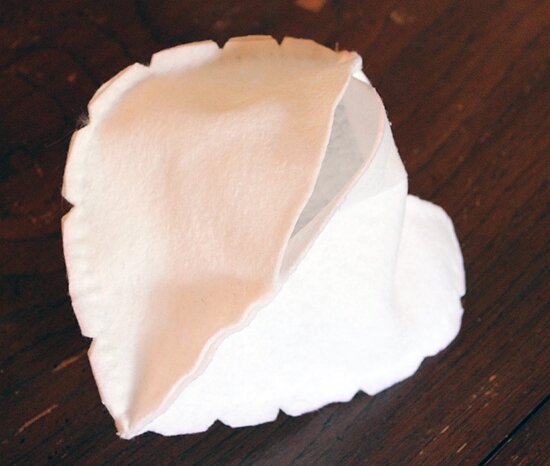
Sew the pieces of the 2 large body segments together, putting the ‘right sides’ or outside together. The right side should be the smoother, shinier side of the felt. Sew 5/8″ from the edge of the felt. Do the same with the arm stubs. -
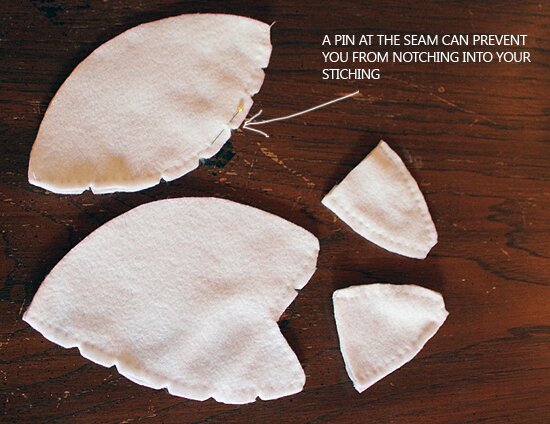
Notch or trim closely along the edges, being careful not to cut into the seams. This will make the seams more flexible when you turn the ball inside-out. Sew and notch the other 2 segments together as well. -
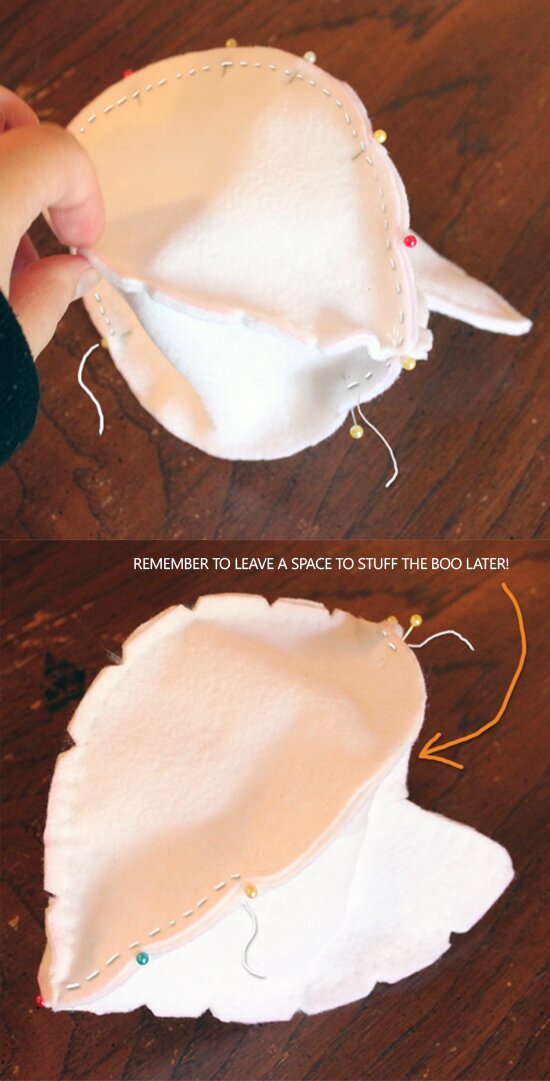
Open and flatten the open sides of the sections you just sewed, and put them together, right sides touching. First pin the ends, flattening out the seams so that it will be easy to sew through them. Next, pin the outer edges. Sew all the way around, going through both seams. Be sure to leave an open space about 3 or 4 inches wide so you can turn and stuff the ball. -
Turn the body inside out and use your fingers to flatten and contour the seams, bringing out the spherical shape.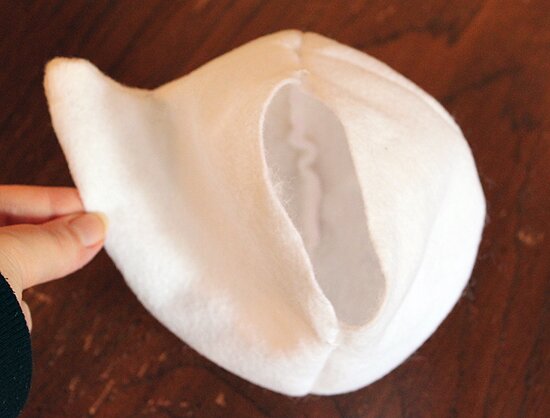
-
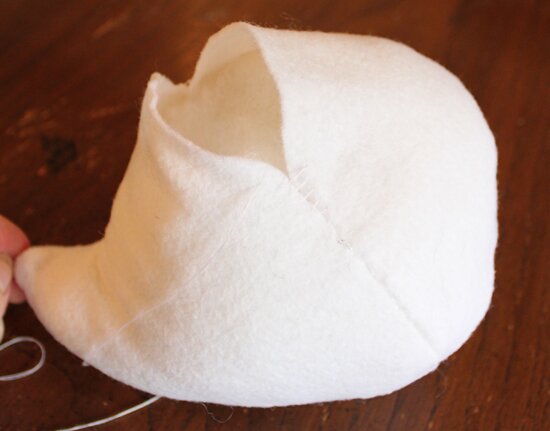
Stuff it! -
Use a ladder stitch to close the seam. Here’s some directions on how to do a ladder stitch: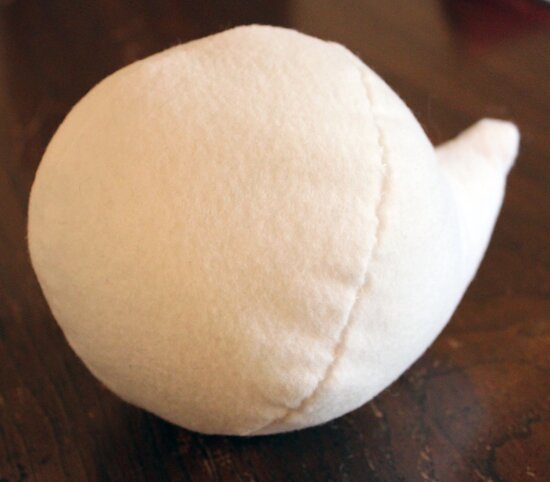
-
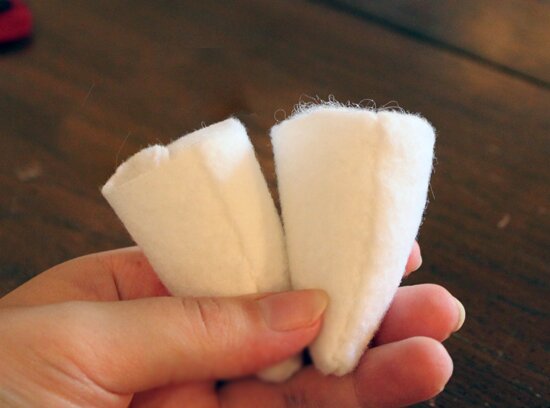
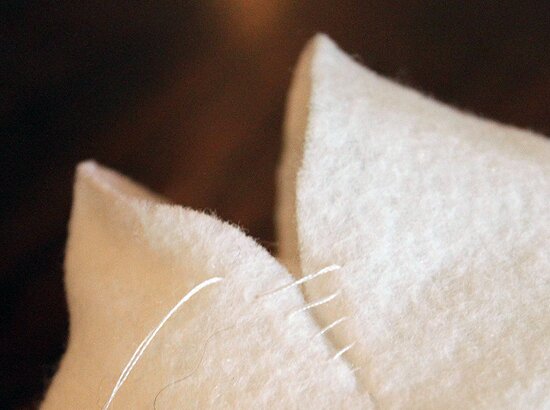
Now for the arm stubs. Turn the arms inside out and then fold the edge over to create a clean edge. Stuff the arms. -
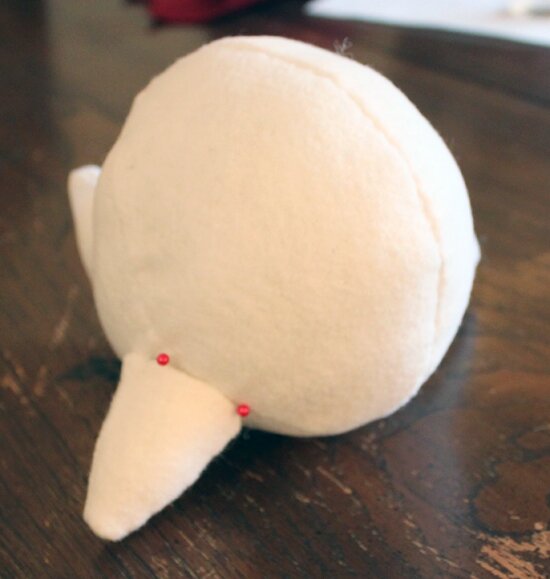
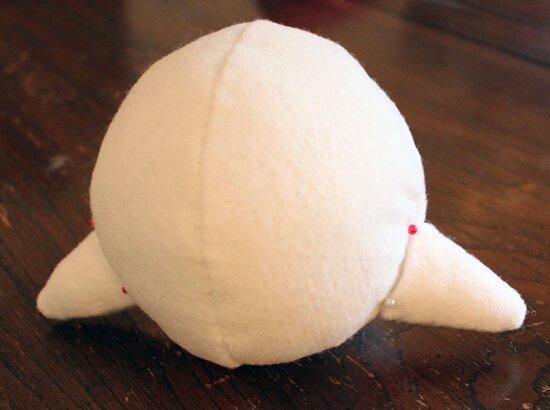
Pin the arms to the Boo and sew them on using a ladder stitch. I opted to put the arms lower so it could stand on it’s own a little easier. -
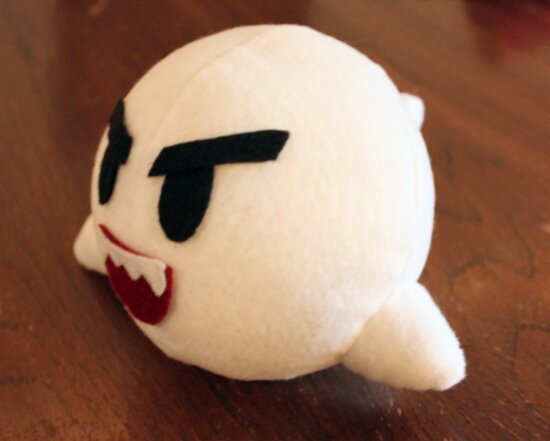
Glue the face on the Boo, let dry for a few hours, and you’re good to go!
If you make one of these plushies and have an image posted on the web, please post a link in the comments! I love seeing people’s finished works, and I plan on making a separate blog post with the finished plushies!
Liked my tutorial? Interested in supporting a hungry artist? Check out my iPhone apps:


Seriously. I’m poor
- Share:
 Bookmark on Delicious
- Digg this post
- share via Reddit
- Share with Stumblers
-
Subscribe to the comments on this post
OMG! THIS IS AMAZING. I used your Kirby pattern and made a Navi from LoZ: Ocarina of Time. I made her wings a big small -_-;. But she still looks adorable. I was wondering. Do you think you can make a Cucco? The chicken you see in Legend of Zelda. I’m still new to this sort of stuff and with the help of your pattern, I managed to make Navi (even though she’s fat XD). If not, then do you know where I can get a pattern guide for a chicken? Thank you in advance for any help you give. It is most appreciated.
[...] up a felt plush toy for King Boo, of Super Mario fame. I had found an awesome tutorial on this http://blog.seremeres.com/?p=87 and immediately wanted to give it a try. Here’s how it turned [...]
Thank you so much for the tutorial!
With this I plan on making a ton of these little guys and hanging them out on the patio. Here’s the first one I made
http://tyerva-sama.deviantart.com/#/d5g31e3
Great article and straight to the point. I am not sure if this is really the best place to ask but do you folks have any thoughts on where to get some professional writers? Thank you
Plush toys are fashioned. If we learn to do them, the we could give to our children, they are left happy. Thanks for this tutorial.
Heyyy thanks for the tutorial! I know this post is old but I used your template to make myself a tiny 2″ Boo!
My Boo has a few differences though. Other than being smaller (I shrank the template so I could hang it on my car’s rearview), I also altered the facial features a little to make it look more like the Boo from the game (different eyebrows, bigger mouth, and a shine on the eyes). I’ve never made a plushie before so this was really useful!
Here’s a link to my completed Boo:
Thanks again. You’re awesomesauce. <3
Hi again!
I left a comment back in October with a link to the Boo that I made from your tutorial.
I used your Boo as a springboard to make myself a Chain Chomp and thought you might like to see what you inspired. This is a really, really new blog with a whopping two posts. but hopefully it will grow. I did provide a link to this tutorial and gave you credit, of course!
If you’d like to see it, you can look here:
http://angleascraftydistractions.blogspot.com/2012/01/chain-chomp-plush.html
Thanks!
I made one of these recently, and it turned out pretty cute. I love this pattern! X3
http://vanillawish.deviantart.com/art/Lady-Bow-Plush-275948297
Looks great, Boo is very cute
Thank you very much !
BTW I would buy an App but I have Android not Iphone
But I do Thank You!
BOO! My kids shall have this cutie with them for Halloween as they Trick or Treat as Mario and Luigi! Thanks for this!! I am going to try and figure out how to make a 3D mushroom plush from your patterns as well, if I have the time. 0_o Cheers!
Hmm. My comment yesterday didn’t post for some reason.
I know that this tutorial is almost a year old, but I just discovered it a little while ago and made one. I love Mario, and with Halloween on it’s way this little Boo seemed like the perfect craft! Your instructions are crystal clear and I love the way my Boo turned out.
If you want to see my version, I posted it on my blog. My blog is a 365 day project with a turtle theme so I had to make my Boo fit the theme. Here is a link to my post.
http://angelasdailyturtle.blogspot.com/2011/10/252-pin-turtle.html
Thanks for sharing your tutorial.
waa!! aah boo tutorial!! i was searching for one in deviant but don´t find nothing!! thanks for the tutorial i´ll try it! (but someday now i have a list of plushies to make before for friends)
[...] Boo’s cute factor is something that makes him an original enemy and not just a copycatted ghost. He’s got the small guy with big eyes thing going for him, but he’s also very shy. The only way to get him to stop floating after you is to look his direction, in which case Boo will panic and cover his eyes in shy embarrassment. His worry of being seen and his pathetic attempt to conceal himself (in peek-a-boo fashion, nonetheless) makes him simply a perfect would-be plushie (and I’m sure there’re dozens of varieties). [...]
http://beanielova.deviantart.com/art/Bomb-Boo-Plush-185328950
I made last November. First time sewer. Thank you (:
More plusie’s! I need to make moreeee!!
Great Boo. And Kirby too!
I was searching the interwebz when I ran across your site. This boo is amazing! How long did it take you to create the pattern? Have you ever thought of doing any pokemon tutorials? Keep up the great work =D
The pattern was pretty simple, but prototyping takes a bit longer. It might be fun to try pokemon tutorials but I’m not that familiar with some of the newer pokemon so I’m not sure what’s popular.
Yay! Finally I can have a boo plushie of my own!! This tutorial was soo helpful, Boo is the BEST! Thank you very much!
Here’s my Pink Boo
C:\Users\Serenading Sunflower\Desktop\DSC_0190.JPG
[...] you can find the tutorial to make this little Boo on the Seremeres blog which involves a handful of needed materials and can [...]
This is a great project. I love Boo. My son is going to be Super Mario for Halloween. It would be fun to have this for him to take pictures with. Thanks for the tutorial. I am linking to this post on my blog.
This is awesome! I have all boys and they are going as Super Mario characters for Halloween. If I can get everything together in time, maybe I will have a little time to make them each a plushie!